Showing posts with label Head model. Show all posts

Monday, 5 December 2011

Hair

Hair was added to the model using the hair and fur modifier. After applying the modifier the whole head is covered in hair. In polygon selection mode within the hair modifer the polygons for where I wanted the hair were selected.


Clicking update selection updates the hair to this selection.


Rendering the hair now shows that it needs to be styled  and the colour changed.


Using the tools for the hair modifier the hair can be cutand styled. Selecting the style hair button allows the tools to be used. I used the cut tool to make the hair shorter.


Next I used the hair brush tool to style the hair. This proved quite difficult as it was hard to get the hair to flow correctly.


Rendering now resulted in the image below.  But the hair is too light even when using a dark colour and not thick enough towards the front.

First attempt
After animating the head I decided to try the hair and fur modifier again.

I tried to apply the hair with the turbosmooth turned of but this didn't work as when it was turned back on the hair was place in the wrong place.


The hair again was too light gain but this time I found what the problem was. I as the mental ray rendering engine was being used I needed to change the hair rendering options to MR Prim. This converts the hair into geometry during render time.

Hair too light and thin
This can be changed by going to Environment > Effects > Hair&Fur > Hair rendering options > and then changing hair to MR Prim.

This took longer to render but the results were looking better but the hair was still the wrong color.

Hair with MR Prim
The hair was displaying the wrong colour as when using MR Prim the material shader needs to be set under mr paramertes. Click apply mr shader and then drag a material from the material browser to the slot and select instance. This allows changes to the material to be made in the material editor.


There are no mental ray hair shaders in 3ds max so I just used a standard material with with a gradient ramp in the diffuse material slot. I set the ramp between two colours so that the hair had a gradient applied to it so that all the hair didn't look the same colour.

Once this shader is used all of the colour settings are controlled in this material and no longer in the hair modifier.

A mental ray hair shader could be used as this would help to create a better hair effect.

I left the count at 15000 and set the cut length of the hair to 12 to make it shorter. I selected style hair and then clicked recomb hair to comb the hair in line with the surface of the head. As the hair was quite short this worked quite well so the hair did not need much combing.


I then increased the count under the multi strand parameters to create child hairs that would increase the amount of hairs and increase the thickness of the hair.

Multi strand renders a clump of hairs around the original hair. I increased the count to 5, root splay to 0.1, tip splay to 0.2 and the randomise value to 0.2. The splay settings determine how much the hair scatters. The randomise determines how random the hairs are in the clump.

New version
I now think that the hair looks too dark but this could be changed easily by adjusting the material. I think that the second time doing the hair it has turned out better but I don't think that hair style is not as good the first time I created it.

More time could be spent on the sytling of the hair and the material that is applied to it.

Sunday, 4 December 2011

Face animation

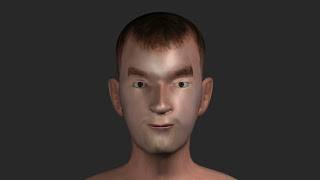
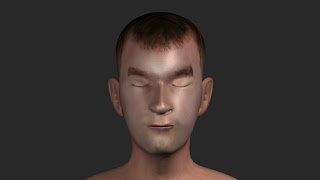
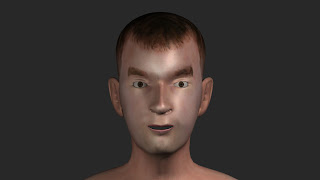
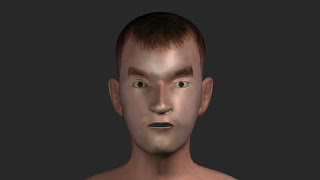
I have used the morpher to animate my head. I created a short sequence showing various facial expressions. These are a smile, surprise, a frown, a wink and blinking.

Using autokey the settings for each of the morph target could be animated.Using the dope sheet gave more control than just the timeline as it made it easier to see which keys were set for each morph.

Dope sheet
All keys in place

Smile

I closed the eyes a little bit to that they were not so wide and moved the slide for the smile morph so that it was 100%.

Surprise


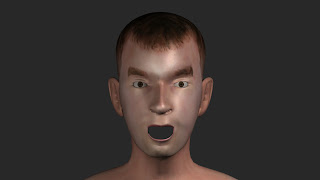
I closed slightly more before this expression to create more anticipation for the movement. I then opened the eyes fully along with the mouth and raised the left and right eye brow. I moved the top lip up slightly to improve the shape of the mouth.
Frown


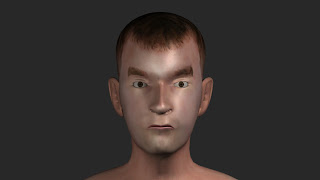
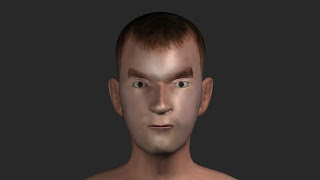
I kept the eyes a little bit closed and moved the slider for the frown morph to 100%. I also used the brows down morph as well.

Wink


I set the smile slider to 100% and eye closed one of the eyes briefly.

Blink


For the blink I closed both the eyes close at same time for a short amount of frame.

Curve editor

Once the keys were set for the animation I used the curve editor to adjust the tangents to speed or slow the animation.

Curve editor
For the blink I set both the ascending and descending part of the curve to a fast tangent so that the eyes opened and closed very quickly.

Blink curve
For the surprise expression I  set the curve for opening the mouth, brows up and eyes open to a fast tangent and left the end of the curve how it was. The curve for the wink was set to a slow tangent so that this animation happened more slowly.

Mouth open curve
More morph targets could be created to allow more expressions to be made by the face. I didn’t use any head movements in the animation but these could be added to make the expressions look more realistic.

Having animated this section I have seen that some of the morph targets that I have created could be made to be moved more as the 100% full movement is still very slight when applied to the head.


The rendered animation is 14 seconds and can be seen above. The video is low quality when uploaded to blogger but allows the animation to be seen.

Sunday, 27 November 2011

Morpher

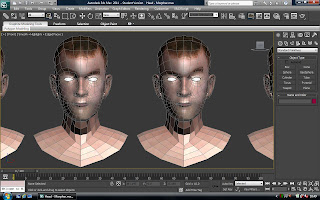
The mopher modifier will be used to animate facial expressions for the head model. The head will be cloned and the vertices moved on them to create different facial expressions on each of the heads, these will then be linked to the morpher modifier so that they can be used to the animate the face.

I started by taking my head model and collapsing the modifier stack so that the symmetry and UVW unwrap modifiers were applied to the model. Applying the UVW unwrap modifier keeps the settings in the mesh and these can be got back by applying a unwrap UVW modifier again.


I turned off the turbosmooth modifier and cloned a series of heads to be used to create the different expressions that will be used with the morpher modifier.


I removed the turbosmooth modifiers from the cloned heads.


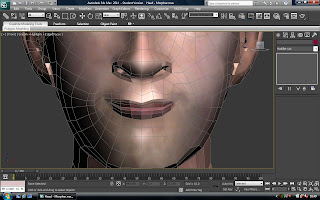
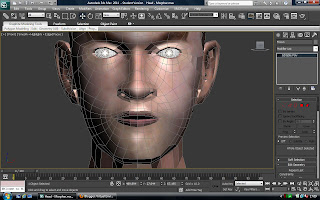
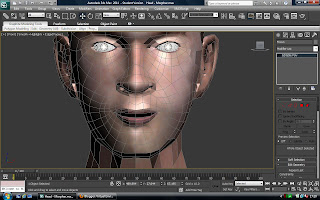
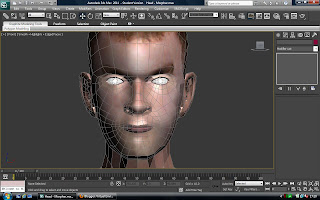
On the first head I decided to create the mouth open. I selected the polygons for the mouth and chin and moved it down. When using the morpher modifier you can’t change the amount of polygons, only move then about or it will not work.


On the next head closed the right eye. I selected the polygons for the bottom of the eye lid and then the top and positioned them so that the eye lid was closed.


I did the same on a different model for the other eye.


Now to apply the morpher modifier. I took the original head and added a morpher modifier below the turbosmooth.


I right clicked in one of the empty slots, selected pick from scene and then clicked on the first cloned head with the mouth open.


At the right of this is a box that can changed from 0-100. Changing this amount on will blend the effect of the mouth open model into the original model. This will allow the how much the mouth opens to be controlled.


The left and right eye opening was added in the same way. Now using the morpher modifier both the eye opening and mouth moving can be animated. They can be used at the same time or individually.

Brows up
I cloned more heads from the original and adjusted them to create the left and right brows up, smile, frown, top lip up and bottom lip down. I added these to the morpher modifier in the same way.

Smile
Frown
Top lip up
Bottom lip down
I decided that the mouth wasn't open enough so it increased this and reapplied it to the morpher.


I cloned another head to create a brows down expression this can be used with the frown morph created earlier.

Brows down
With each of these expressions applied to the model using the morpher modifier they can be used to to adjust the expressions of the face. Renders of the expression are shown below.

Normal
Smile
Eyes closed
Frown
Brows down
Bottom lip down
Top lip up
Mouth open
The different expression can be combined together using the morpher to create complex expressions. Here the brows down expression and frown are applied together.


Different morphs could be created for the different phonemes and then these could be used create lip sync animation.

Thursday, 20 October 2011

Final render and Evaluation

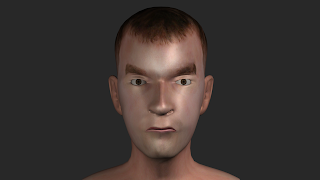
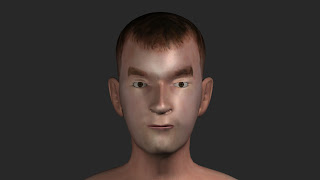
Below is the final render of my head model. I lit the scene and rendered it using mental ray.


I think that my head model has progressed well as I have finished working through all of the video tutorials and am pleased with the results. I think that more time could have been spent on the material stage but some of the stages in creating the model took longer than I had expected. I think that the final result looks reasonably like me but with some more adjustments to the mesh I may be able to improve the likeness.


Other things that could be added to the model are the hair and fur modifier could be used to create more realistic hair rather than just using the flat hair from the texture. Eyelashes could be added as well as hair for eyebrows. More detail could be added around the eye on head model and the eyeball model could include more detail. Subsurface scattering (sss) could be used on the model to create a more skin like texture as this would simulate the way light passes through the skin then scatters in places like the ears.


As well as these additional features the model could be animated to bring life to the model.
Creating the model was challenging but enjoyable. Following the video tutorials was quite straight forward although it was quite hard to join the ear to the head. I am quite happy with the overall model but the nose and lips could do with some work.


I am not great at Photoshop but I am pleased with the way the textures have turned out. I found creating the texture maps quite fun and learnt a lot about a variety of different tools and techniques in Photoshop.


With regard to the 3d modelling I learnt about using create, cut and connect to add to the existing mesh. I also learn more about using the Unwrap UVW modifier and how to correctly unwrap the head model.


It was interesting to learn about the correct layout for topology and I think that planning the topology before starting the model really helped during the modelling stage.


I think that if I had to model a head again I would have a better understanding of how the model should be created and the stages that should be taken.