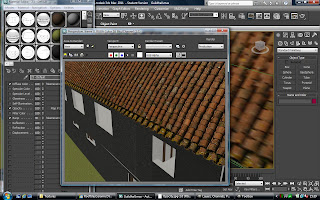
The texture from cgtextures was applied to the roof and was as used as a bump map to create a more textured look. At the bottom of the texture there is a grey section were the tiles end.
I decided to create a opacity map to create the shape of the tiles at the edge of the roof.
I used the magic wand tool to select this section and then added a new white layer above the current layer to be the base for the opacity map.
I filled the selection from the magic wand with black. In 3DS Max where the opacity map is white the object will be displayed as normal but where it is black it will display as transparent.
Next I painted the black sections with the paint brush tool to fill in some gaps that were not included in the selection.
Finally I applied a Gaussian blur to make the lines between the black and white sections not so sharp.
I applied the opacity map to the material in 3DS Max and now the edge of the roof looks more realistic.
To texture the chimney I used a brick texture from the internet. To map the texture I added a UVW map modifier to position the texture. I found that cylindrical mapping worked the best then the texture flowed around the chimney if box or planar were used they were stretched along the edges. I selected cap ends so that the brick texture was applied to the ends.


No comments:
Post a Comment