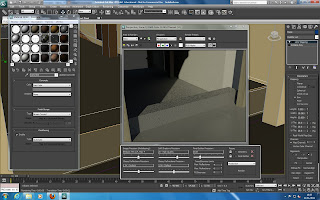
Using the slice modifier applied to the separate objects in the scene the guildhall could be animated growing.
We selected the objects, and with the slice modifier setting to remove top, moved the slice plane below the object so that none of the object was visible. By turning on autokey, moving to a later frame and then moving the slice plane so that the it was above the object the building appeared to grow.
We did this for the groundfloor with the walls and finally the objects inside the building. We animated different parts of the building growing in order the sliced in order and then adjusted the timing so that the different objects growing were a bit more random making it look more organic.
The blueprint slides in on top of the model at this point and then the next part of the building will grow.
We repeated the same process for the for the first floor and then finally the attic.
We rendered a test video and found that this turned out quite well although there were some problems that needed to be fixed.
We decided that we wanted the camera to be closer to be building as it is growing so that it will be easier to see the objects inside. We will also change the speed as it seems to be moving a little to fast.
Sunday, 27 November 2011
Guildhall animation - scene 1
I added the radiators (Jack), fridge magnets (Steve) to the scene and then merged the character created by Hong into the scene. The character was too small so I selected everything in the scene and scaled it so that it was in proportion with the man.
This scene was now ready for the animation, Hong animated the first section where the character turns on the radio. After this we created another file to create the growing building animation. We decided to split the separate parts of the animation into different files to make the scenes more manageable and to allow separate parts of the animation to be worked on at the same time.
Scene 2 of the animation will be the guildhall growing from out of the blueprints on the table.
This scene was now ready for the animation, Hong animated the first section where the character turns on the radio. After this we created another file to create the growing building animation. We decided to split the separate parts of the animation into different files to make the scenes more manageable and to allow separate parts of the animation to be worked on at the same time.
 |
| Render of the table where the building model will be placed |
Scene 2 of the animation will be the guildhall growing from out of the blueprints on the table.
Morpher
The mopher modifier will be used to animate facial expressions for the head model. The head will be cloned and the vertices moved on them to create different facial expressions on each of the heads, these will then be linked to the morpher modifier so that they can be used to the animate the face.
I started by taking my head model and collapsing the modifier stack so that the symmetry and UVW unwrap modifiers were applied to the model. Applying the UVW unwrap modifier keeps the settings in the mesh and these can be got back by applying a unwrap UVW modifier again.
I turned off the turbosmooth modifier and cloned a series of heads to be used to create the different expressions that will be used with the morpher modifier.
I removed the turbosmooth modifiers from the cloned heads.
On the first head I decided to create the mouth open. I selected the polygons for the mouth and chin and moved it down. When using the morpher modifier you can’t change the amount of polygons, only move then about or it will not work.
On the next head closed the right eye. I selected the polygons for the bottom of the eye lid and then the top and positioned them so that the eye lid was closed.
I did the same on a different model for the other eye.
Now to apply the morpher modifier. I took the original head and added a morpher modifier below the turbosmooth.
I right clicked in one of the empty slots, selected pick from scene and then clicked on the first cloned head with the mouth open.
At the right of this is a box that can changed from 0-100. Changing this amount on will blend the effect of the mouth open model into the original model. This will allow the how much the mouth opens to be controlled.
The left and right eye opening was added in the same way. Now using the morpher modifier both the eye opening and mouth moving can be animated. They can be used at the same time or individually.
I cloned more heads from the original and adjusted them to create the left and right brows up, smile, frown, top lip up and bottom lip down. I added these to the morpher modifier in the same way.
I decided that the mouth wasn't open enough so it increased this and reapplied it to the morpher.
I cloned another head to create a brows down expression this can be used with the frown morph created earlier.
With each of these expressions applied to the model using the morpher modifier they can be used to to adjust the expressions of the face. Renders of the expression are shown below.
The different expression can be combined together using the morpher to create complex expressions. Here the brows down expression and frown are applied together.
Different morphs could be created for the different phonemes and then these could be used create lip sync animation.
I started by taking my head model and collapsing the modifier stack so that the symmetry and UVW unwrap modifiers were applied to the model. Applying the UVW unwrap modifier keeps the settings in the mesh and these can be got back by applying a unwrap UVW modifier again.
I turned off the turbosmooth modifier and cloned a series of heads to be used to create the different expressions that will be used with the morpher modifier.
I removed the turbosmooth modifiers from the cloned heads.
On the first head I decided to create the mouth open. I selected the polygons for the mouth and chin and moved it down. When using the morpher modifier you can’t change the amount of polygons, only move then about or it will not work.
On the next head closed the right eye. I selected the polygons for the bottom of the eye lid and then the top and positioned them so that the eye lid was closed.
I did the same on a different model for the other eye.
Now to apply the morpher modifier. I took the original head and added a morpher modifier below the turbosmooth.
I right clicked in one of the empty slots, selected pick from scene and then clicked on the first cloned head with the mouth open.
At the right of this is a box that can changed from 0-100. Changing this amount on will blend the effect of the mouth open model into the original model. This will allow the how much the mouth opens to be controlled.
The left and right eye opening was added in the same way. Now using the morpher modifier both the eye opening and mouth moving can be animated. They can be used at the same time or individually.
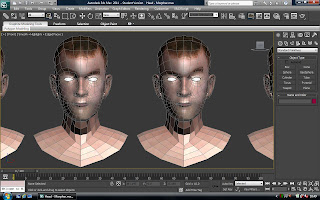 |
| Brows up |
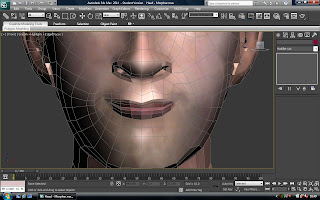 |
| Smile |
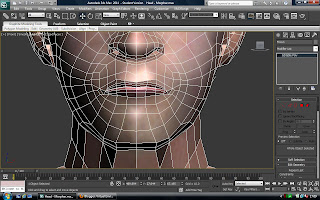 |
| Frown |
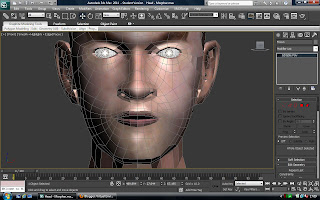 |
| Top lip up |
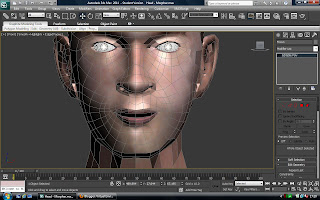 |
| Bottom lip down |
I cloned another head to create a brows down expression this can be used with the frown morph created earlier.
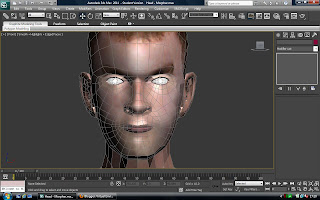 |
| Brows down |
 |
| Normal |
 |
| Smile |
 |
| Eyes closed |
 |
| Frown |
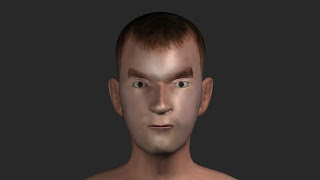 |
| Brows down |
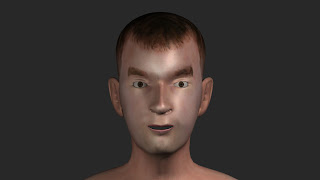 | |
| Bottom lip down |
 |
| Top lip up |
 |
| Mouth open |
Different morphs could be created for the different phonemes and then these could be used create lip sync animation.
Friday, 25 November 2011
Preparing the Guildhall for animation
I finished placing the objects in the scene and then modeled some display cases for the museum and the counter for the shop.
I adpated the table model to create the counter. The computer model will be placed on top of this and some shelves will be placed in the room.
And then for the display cases I used a box extruded a section and positioned it in place.
I selected the top polygon and then used insert tool to create a smaller polygon inside and then extruded this down to create the inside of the display case. I selected the vertices at the top of this section cloned and detached them and then used them to create the glass.
Once all of the objects were in place I cloned the top floor of the guildhall and the table inside and scaled it so that the whole guildhall model would fit on top of the table in the room.
I also merged the environment the was created by Hong into another version of the guildhall model so that this can be used when outside of the model is viewed in the animation.
Monday, 21 November 2011
Placing items in the scene
I took the items from the different members of the group, merged them into the guildhall model and positioned them in the rooms.
Hong
Jack
Steve
I used the floor plans as a guide to place the items into the scene and the other items I placed where I thought they should go. I had to scale the items so that they were the right size for the scene and had to adjust some of the models such as the kitchen cabinets so that they fitted into the space.
Hong
- Fridge
- Cooker
- Sofa
- Table with objects
- Outside environment (with pub and gravestones)
Jack
- Bookcase and books
- Fireplace
- Light switch
- Plug socket
- PC
- Toaster
- Mugs
Steve
- Sink
- Toilet
- Items for table (ruler, book and protractor)
- Kitchen cabinet
- Light fittings
- Picture frames
- Table and chairs
I used the floor plans as a guide to place the items into the scene and the other items I placed where I thought they should go. I had to scale the items so that they were the right size for the scene and had to adjust some of the models such as the kitchen cabinets so that they fitted into the space.
 |
| Kitchen |
 |
| Top floor reception |
 |
| Library |
 |
| Library fireplace |
 |
| Museum |
 |
| Shop |
Thursday, 17 November 2011
Slice
In the animation the guildhall will grow from the blueprints into the renovated model. To animate the building growing we will use a slice modifier and animate the slice plane.Other methods could be used such as moving the vertices that make up the model but as the model is quite complicated this would make it quite difficult to do it this way.
The slice modifier will be applied to the separate objects that make up the model so that they can be animated separately. All of the objects could be attached or grouped together and then the slice modifier applied but this would give less control over how the model can be animated.
I selected the attic part of the model, applied a slice modifier and selected remove top from the options on the modifier. By selecting remove top all of the model above the slice plane is removed, slicing through the model. When the slice plane is moved the the location where the model is sliced changes. This will allow slicing to be animated to create the building growing.
Using the slice modifier works well to create this effect but when the slice modifer cuts off the top of the model it leaves a hole where there are no polygons. To fix this a cap holes modifier can be added, this caps any holes in the model.
As a multi/sub object material is applied to the guildhall the material applied to the newly created faces is incorrect. To fix this a material modifier can be added, above the cap holes modifier, and then the material id set.
I also moved the uvw map modifier to the top of the modifier stack so that the materials would be mapped correctly onto the sliced object.
Although this method seems to work well for many of the objects some of the more detailed objects such as the ground floor, first floor and chimney cause problems. With the chimney the cap holes modifer fills the hole in the top and with the building the model is incorrectly capped when the slice moves right near the top or bottom of the model.
The cap holes modifier works by selecting the border and then capping this hole. If an edit poly modifier is added above the slice modifier you can see that selecting the border and then selecting cap this creates the same effect. A way to solve this problem may be to remove the cap holes modifier on the objects that cause a problem and instead use an edit poly modifier and manually fill in the holes in the model by selecting the edges and then using the bridge tool.
The cap modifier also created a polygon at the base of the model even when the slice modifier was not applied. This was caused because there were no faces at the bottom of the walls, I fixed this by creating these faces around the bottom of the model.
The slice modifier will be applied to the separate objects that make up the model so that they can be animated separately. All of the objects could be attached or grouped together and then the slice modifier applied but this would give less control over how the model can be animated.
I selected the attic part of the model, applied a slice modifier and selected remove top from the options on the modifier. By selecting remove top all of the model above the slice plane is removed, slicing through the model. When the slice plane is moved the the location where the model is sliced changes. This will allow slicing to be animated to create the building growing.
 |
| Slice |
 |
| Cap holes |
I also moved the uvw map modifier to the top of the modifier stack so that the materials would be mapped correctly onto the sliced object.
 |
| Material |
The cap holes modifier works by selecting the border and then capping this hole. If an edit poly modifier is added above the slice modifier you can see that selecting the border and then selecting cap this creates the same effect. A way to solve this problem may be to remove the cap holes modifier on the objects that cause a problem and instead use an edit poly modifier and manually fill in the holes in the model by selecting the edges and then using the bridge tool.
 |
| Polygon created at the bottom of the model |
Finishing the model and textures
Finishing the model and textures ready for animating.
With the stairs created I decided to create the spindles that go beneath the handrail. I used a cylinder and then used the array tool to create the rest of them.
The doors were created from boxes, I adjusted the height and width so that they fitted in the wall sections. Next I modelled the door handles, I started with a cylinder and adjusted the shape of this by scaling sections of the cylinder. Finally I applied a turbosmooth modifier to create the final shape for the handle and added a symmetry modifier to create the one for the other side of the door.
I modeled different types of handles for the different doors in the guildhall. I applied a wood texture to the doors and a metal texture to the handles.
Finally I decided to optimize the model by removing any unneeded edges. I used target weld to join the unneeded vertices. Now the sides of the model are much simpler.
I selected the objects for the different parts of the model and created selection sets to make it easier to select them when needed. Selection sets allow you to select multiple object with one click.
To create a selection set select the objects and then type in a name for the set into the selection set box on the top toolbar and press enter. These objects can easily be selected again by selecting the name from the selection set drop-down box.
When creating the guildhall model I modelled it in separate parts. This makes it easier to see into the model as the different sections of the model can be hidden. Using selection sets the attic, first floor or ground floor can be easily selected and hidden.
Next I will look into how it can be animated to create the growing effect that we are after for the animation.
Friday, 11 November 2011
Finishing the textures
With most of the modelling done its time to finish the textures for the guildhall. I switched to using the mental ray renderer.
I added a daylight system to the scene, set it to use mr sky and sun, and adjusted the time and location so that the scene was well lit. This add some realism to the scene and having done this the renders of the model looked much better.
For the guildhall material I used a white material and added a noise material to the bump channel to add a slight texture to the guildhall walls. I adjusted the settings for the bump map so that it only created small bumps on the model. This can be seen in the window render below.
To texture the windows I used some materials from the Autodesk material library. I used a glass for the planes and Aluminium metal for the the frames.
I also created the stairs for the model by selecting stairs option from the drop down from the create tab. I used U and L type stair for the various different stairs in the guildhall. It was hard to get them right so that they would fit into the correct place.
I cut holes in the floors that I had created for the stairs and lift. I took the planes with shell modifier applied and split them into two planes one for the ceiling and one for the floor of the room above and then textured these.
To create the floor texture I followed a tutorial. I added a tiles material to the diffuse slot in the material and adjusted the settings for the tile material so that they looked more like planks of wood than tiles. I adjusted the settings for the rows and columns and applied a wood material to the texture for the tile to create the colour for the wooden floor. For the wood material I changed the map channel to 2. I applied two uvw map modifiers to the floor and changed one of then to also have a map channel of 2, allowing the mapping for the tiles material and the wood material to be adjusted separately.
Tutorial for flooring: http://www.creativecrash.com/3dsmax/tutorials/materials-and-texturing/c/customizing-your-wood-floor-parquet-material-
To texture the beams I created a brown material and then used a image texture of wood to create the bump mapping for the beams.
I added an autodesk concrete material to the steps and adjusted the tiling so that it was the right scale.
I modelled the glazed walkway using the reference planes and then used glass material and a plastic material to texture this section.
I created the brick section at the bottom of the guildhall by using a mulit/sub-object material. I applied the guildhall material created earlier and applied a brick material to the second. I selected the polygons where the brick texture needed to be applied to and set them to a material id of 2.
I modelled the kerb for the road and the sunken path on the ground plane and textured this in the same way using different material ids for each material.
What still needs to the done on the guildhall model is to add more detail on the doors and to improve some of the textures.
I added a daylight system to the scene, set it to use mr sky and sun, and adjusted the time and location so that the scene was well lit. This add some realism to the scene and having done this the renders of the model looked much better.
For the guildhall material I used a white material and added a noise material to the bump channel to add a slight texture to the guildhall walls. I adjusted the settings for the bump map so that it only created small bumps on the model. This can be seen in the window render below.
To texture the windows I used some materials from the Autodesk material library. I used a glass for the planes and Aluminium metal for the the frames.
I also created the stairs for the model by selecting stairs option from the drop down from the create tab. I used U and L type stair for the various different stairs in the guildhall. It was hard to get them right so that they would fit into the correct place.
I cut holes in the floors that I had created for the stairs and lift. I took the planes with shell modifier applied and split them into two planes one for the ceiling and one for the floor of the room above and then textured these.
To create the floor texture I followed a tutorial. I added a tiles material to the diffuse slot in the material and adjusted the settings for the tile material so that they looked more like planks of wood than tiles. I adjusted the settings for the rows and columns and applied a wood material to the texture for the tile to create the colour for the wooden floor. For the wood material I changed the map channel to 2. I applied two uvw map modifiers to the floor and changed one of then to also have a map channel of 2, allowing the mapping for the tiles material and the wood material to be adjusted separately.
Tutorial for flooring: http://www.creativecrash.com/3dsmax/tutorials/materials-and-texturing/c/customizing-your-wood-floor-parquet-material-
To texture the beams I created a brown material and then used a image texture of wood to create the bump mapping for the beams.
I added an autodesk concrete material to the steps and adjusted the tiling so that it was the right scale.
I modelled the glazed walkway using the reference planes and then used glass material and a plastic material to texture this section.
I created the brick section at the bottom of the guildhall by using a mulit/sub-object material. I applied the guildhall material created earlier and applied a brick material to the second. I selected the polygons where the brick texture needed to be applied to and set them to a material id of 2.
I modelled the kerb for the road and the sunken path on the ground plane and textured this in the same way using different material ids for each material.
 |
| Church side |
 |
| Road side |
Subscribe to:
Comments (Atom)


