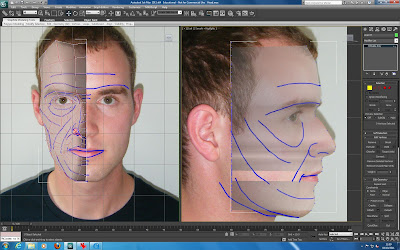
I started by moving the middle vertices into place and then continued moving the next vertices along and so on.
It got very confusing when moving the vertices especially the vertices around the eye as they had to overlap.
When moving the vertices by the nose I thought that I would need some more vertices to create the bridge of nose.
This is the final mesh at this stage, next I will add a symmetry and a turbo smooth modifier.
This step was the most difficult part so far of creating the head model. It started off being quite difficult but then as more of the vertices were in the right place it was easier to place the remaining vertices.
I found that the two reference images didn't line up exactly but this wasn't that much of a problem as having already placed the vertices in the correct place in front view meant that I only had to move them along one axis.


No comments:
Post a Comment